This section is about Arrays, and more specification on other useful nodes.
Arrays
Simply put, arrays are a collection of elements.
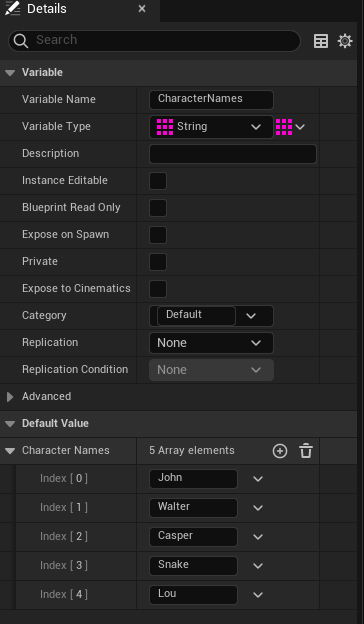
In the above example, the array here is a variable of strings which are defined in the Array elements list.
To create an example array, do the following steps:
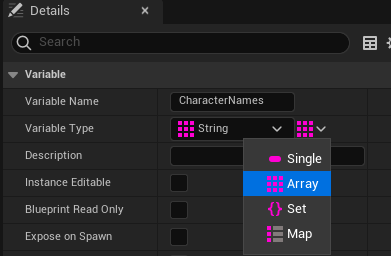
- Create a variable and name it. In this case, we’re using a string variable.
- After creating the variable, go to the Details view of your new variable and under “Variable Type”. There is a button to the right of that dropdown box. Select it, and select “Array”.
3. After compiling, you can begin populating your array with elements in the “Default Value” section.
Items of note:
- The initial first “value” in an array lists with “0”.
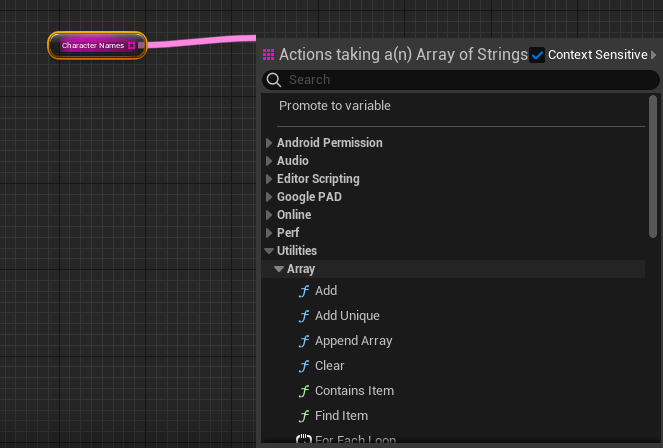
- You can get contextual list of “Array Function” nodes by dragging off the Array node > Utilities > Array
More Blueprint Nodes (Flow Control)
Is Valid Node
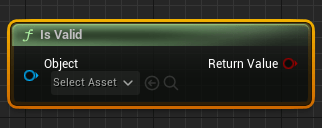
Is valid node is useful for checking the state of an object in the level. A good example of using this node is to setup a validation check on if the player has spawned into the level.
Sequence Node
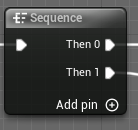
A sequence node executes graph nodes in sequential order. A sequence node is a useful way to organize and keep a graph compact.
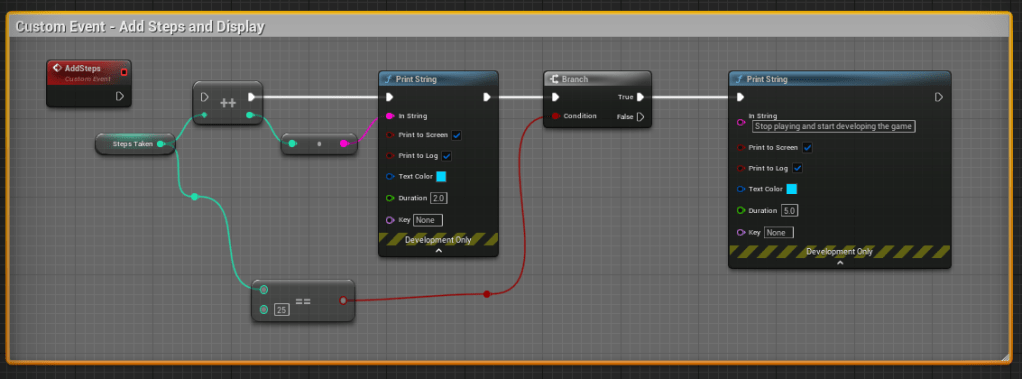
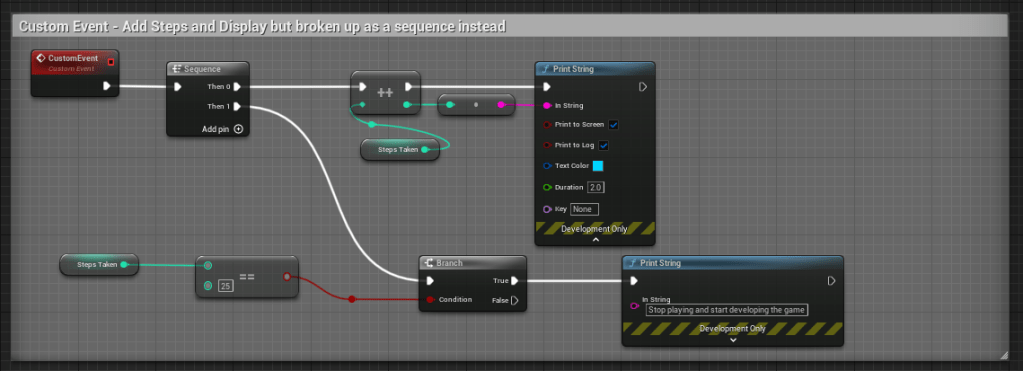
Below are two example ways of setting up a custom event graph, the first does not use a sequence node, but the second example does. Both graphs do the exact same functionality.
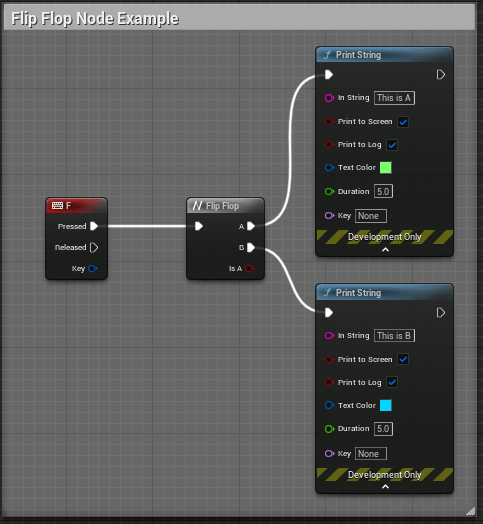
Flip Flop Node
A Flip Flop node switches from A to B on a defined event. Below is an example of a Flip Flop node in use. When the user presses the “F” key input, the functionality will alternate between what is defined in “A” and “B”.
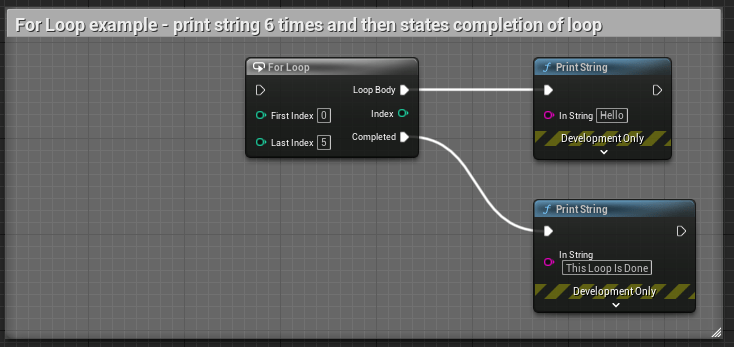
For Loop (Flow Conrol) Node
Loops are used to repeat a defined graph.
- The indexes within the node can be variables connected to the node or defined as a specific amount.
Below is an example of a simple “For Loop” that will print string a message on screen 6 times and then print a second message on completion of the loop.
For Loop With Break Node
This node is the same as the above node, but with an additional execution pin, “Break”.
Break can be used to set a custom event* or some other function to occur when a condition is met, and it will “break” the loop.
*Remember that the custom event will need to be called within the loop body, otherwise it will not play.
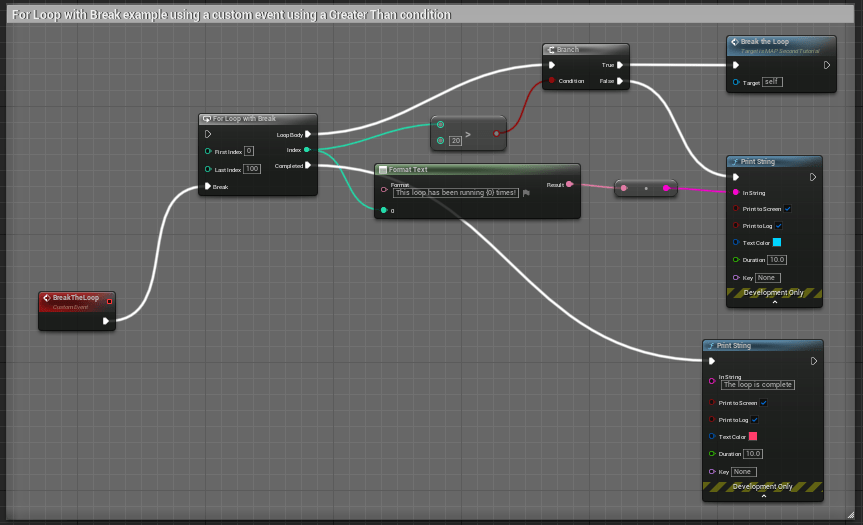
The above example has some logic to “Break” the loop and call an event when when the loop index is greater than 20.
While Loop
This is a potentially expensive node and should also be used sparingly. For example, I’ve set up a situation where an infinite loop can occur that causes an error.
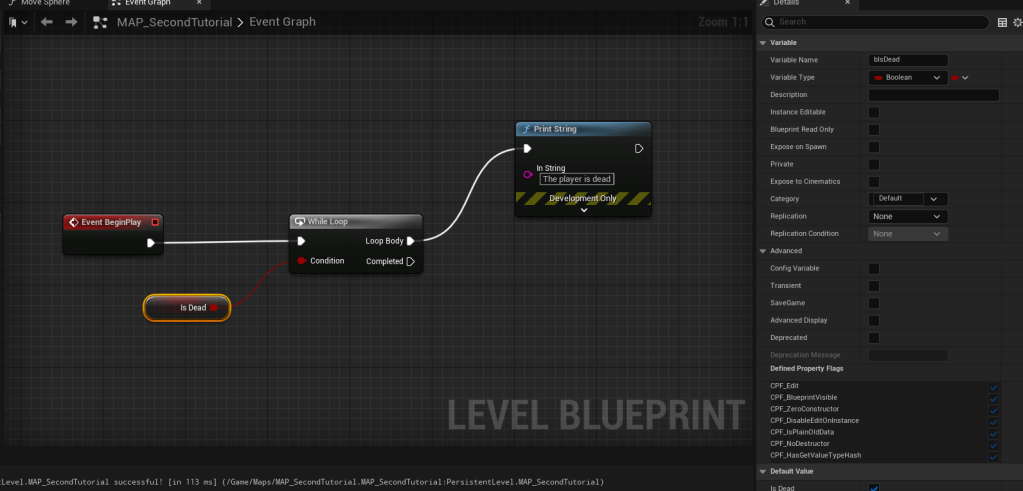
In the above example, the logic is set to check to see if “IsDead” is occurring. Since there is no defined logic that changes the “IsDead” state the check on loop is infinite and displays the following error when pressing “Play”.

A better example of using “While Loop” is setup here:
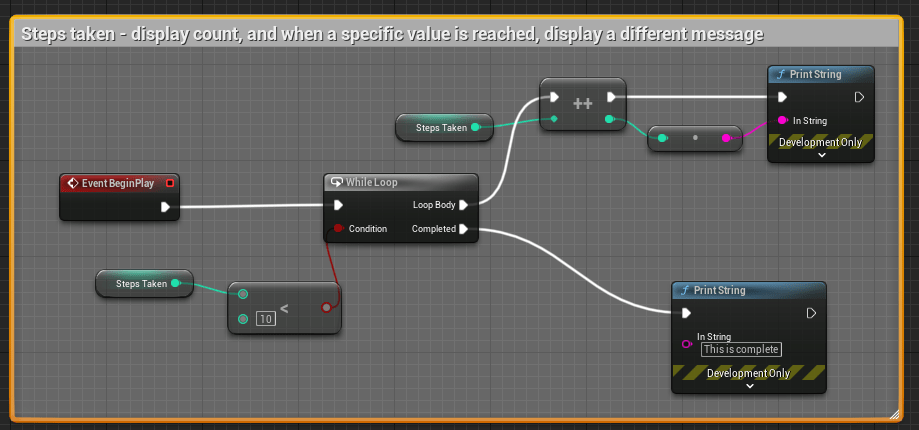
In the above example, the condition is looking for an integer value “Less than” 10. When in that threshold, the loop body is incrementing the steps by 1 and displaying the number of steps taken. When the condition is met (10 steps) a different message is displayed on screen.
Do Once & Do N Nodes
The Do Once node will only do a specified node sequence that is set after this node to occur once, unless another set of logic is defined on “Reset” of the node.
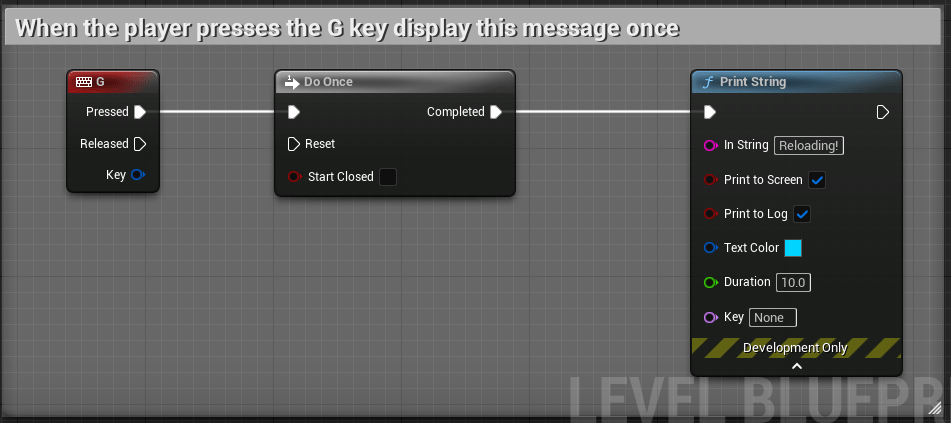
In the above example, when the player presses the “G” key, display this message once.
A better example using a custom event with a reset condition can be seen below.
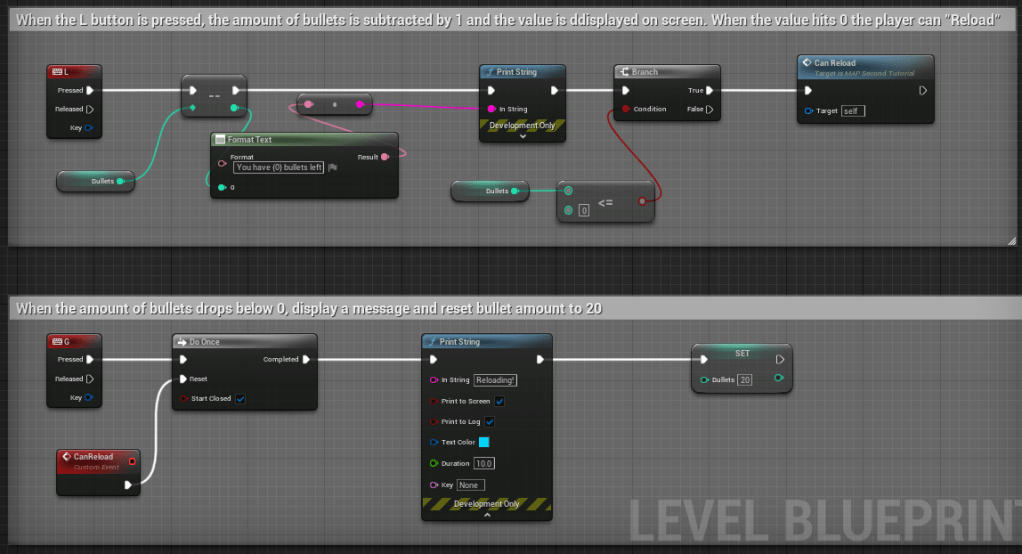
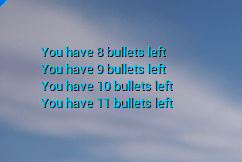
In the above logic, we have defined the amount of bullets to start at “20”. As the player presses “L” a deduction from the starting value of bullets occurs and displays a message. When the player reaches “O” or below bullets, the Branch then initiates the Custom Event, “Can Reload” to become available. The player then presses “G”, which displays a “Reloading!” message and sets the amount of bullets back to 20.
Do N Node
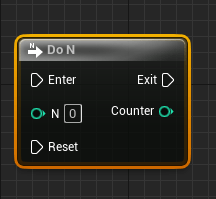
The Do N node can be used to define a sequence to occur a set number of times, by either defining a value in “N” or by using a variable to “count”.
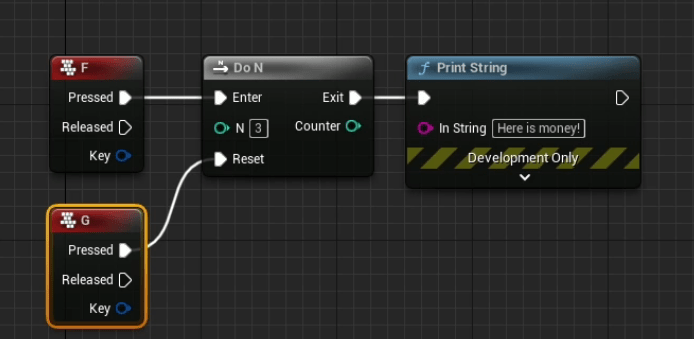
In the above example, after the player has pressed “F” 3 times, no longer display the “Here is money!” message, and then allow the “G” key to reset the condition.
Gate & Multi Gate Nodes
The “Gate” node is used to create a graph sequence that “opens” and “closes” a gate based on the logic defined with execution pins connected to this specific node.
Below is a simple example of “Gating” logic using custom nodes.
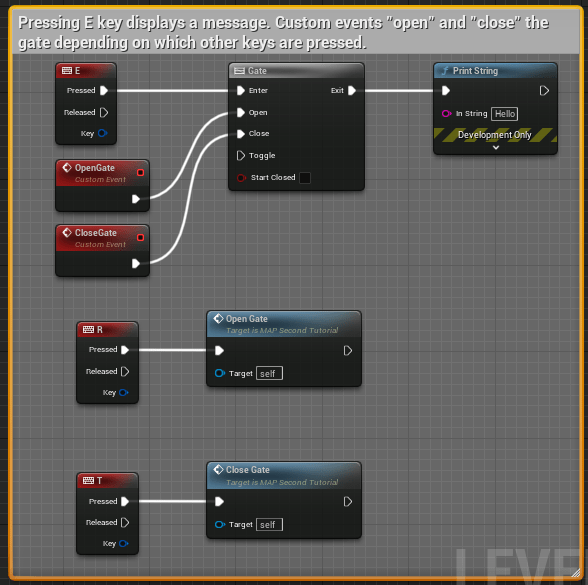
By default, the gate is set to “Open” because the “Start Closed” checkbox is unchecked. In this series of logic, pressing “E” will display a message on screen. If the player presses the “T” key, the gate then becomes closed (meaning, the message will not appear on a keyboard press), but pressing “R” will “open” the gate once again.
MultiGate Node
The MultiGate Node uses the same principles as the “Gate” node, but has a few more items that can be adjusted, including multiple “Out” execution pins.
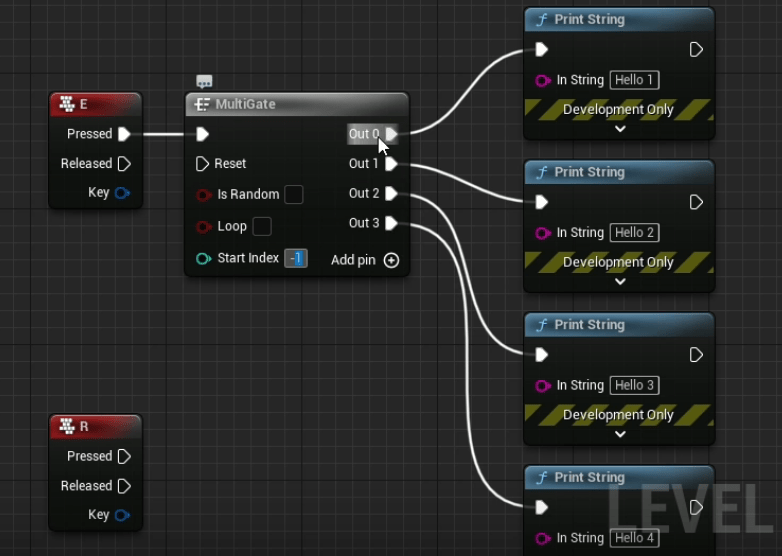
In the example above, when the player presses “E”, the MultiGate node runs through each Out sequence as the player interacts with the defined key.
- It should be noted that the “Start Index” is defaulted to occur with “Out 0”, but the value can be set within this node.
- The gate will also stop after the final execution pin has completed unless the “Loop” option within the node is checked.
- The “Is Random” checkbox can also be used to “randomize” the outcome.