More details and breakdown notes for this post, including information on Event nodes, Custom Events, Functions, and Macros.
Blueprint Nodes, Part 2
Event Nodes
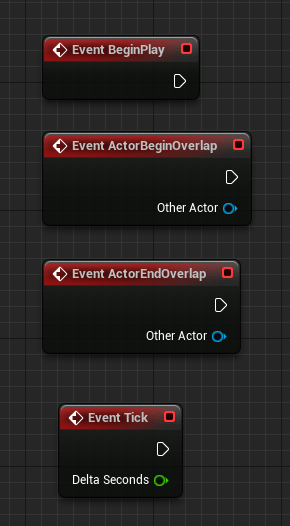
Event nodes are red in color and typically are the starting node in a graph sequence.
An important note! The most expensive and rarely used Event node is the “Event Tick” because of how frequently it “ticks”, which is 60 times per second!
Common Event Node Types
The following are some of the more common event node types frequently used when creating Blueprints. These
Event BeginPlay: Executes associated graph nodes on “Play” of level.
Event ActorBeginOverlap: Executes the graph associated when an entity begins an overlap with a defined “actor”. A common actor used is a “trigger volume”.
Event ActorEndOverlap: Executes the graph associated when an entity exits an overlap with a defined “actor”. A common actor used is a “trigger volume”.
Custom Nodes
Custom Events
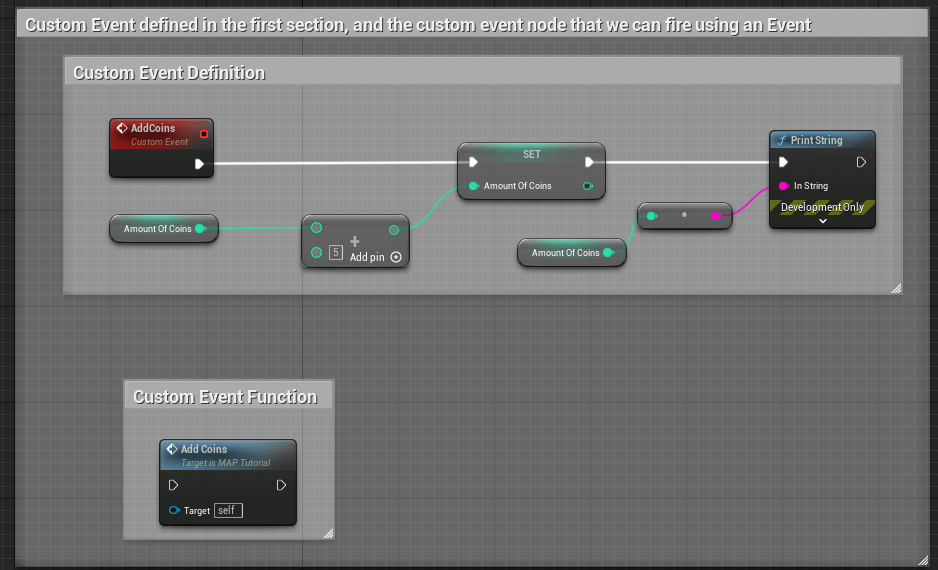
Custom events are event nodes that are specifically defined by a user.
Think of custom events as a larger container of nodes that you will prefer to organize and define once so you can easily reference them using one node instead of duplicating graphs repeatedly.
In the above example, a custom event here is called “AddCoins”. When the event is called, the amount of coins is increased by a value of “5” and the updated amount is displayed using a Print String node.
Special notes on custom events:
- Events cannot have return values or local variables like functions, but the key difference between Custom Events and Functions is that Custom Events are asynchronous by nature.
- Defining “Asynchronous by nature”: You can manipulate time inside custom events (adding delays or timelines). Also, you can replicate them over network (which means they are multiplayer friendly!).
Functions
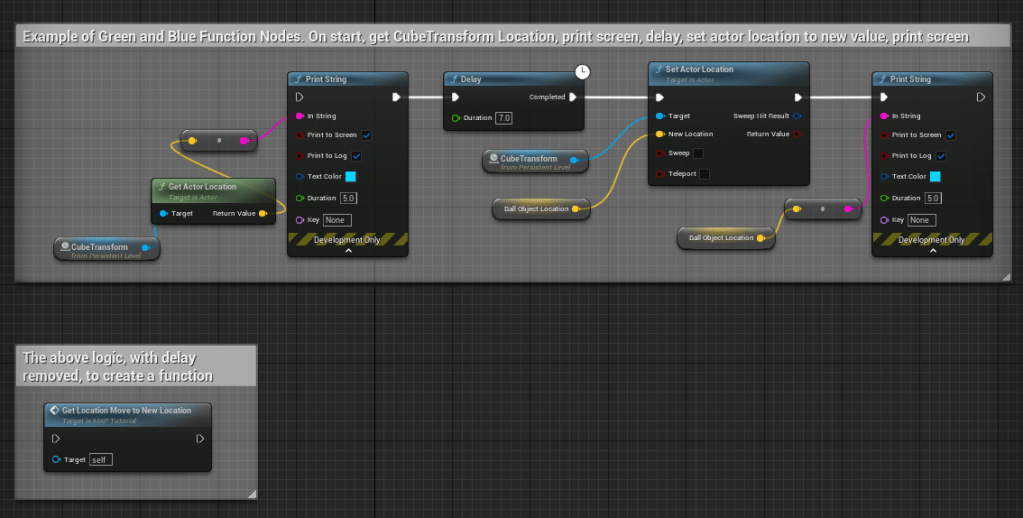
Functions are node graphs belonging to a particular Blueprint that can be executed, or called from another graph within the same Blueprint. Functions have a single entry point designated by a node with the name of the Function containing a single execution output pin (in the above example, notice there is only one entry and exit pin on the blue node below the larger graph).
Special notes on custom events:
- You can create a new function by selecting all of the nodes that pertain to a specific graph that you’d like to group as a function, right click in the BP editor, and select “Create Function”.
- Timed attributes, such as delay, cannot be used in a function (as noted above in the comment of the function example).
- After creating a function, if you double-click on the node it will display all node logic in a separate graph tab for reference and adjustments.
Green vs. Blue Function Nodes
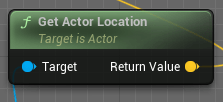
For simplicity sake, we can define Green Function Nodes as Pure Function nodes, which has no execution pins. Pure functions are wired to Data Pins and are automatically executed by the compiler when the data relying on them is required. This means that a Pure Function will be called one time for each node it is connected to.
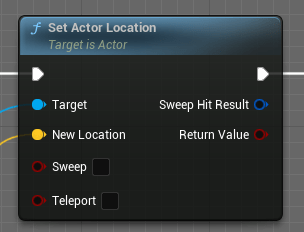
Another way to define the difference between Green and Blue function nodes is that Green nodes “Get” info, while Blue nodes can “Set” info.
Macros
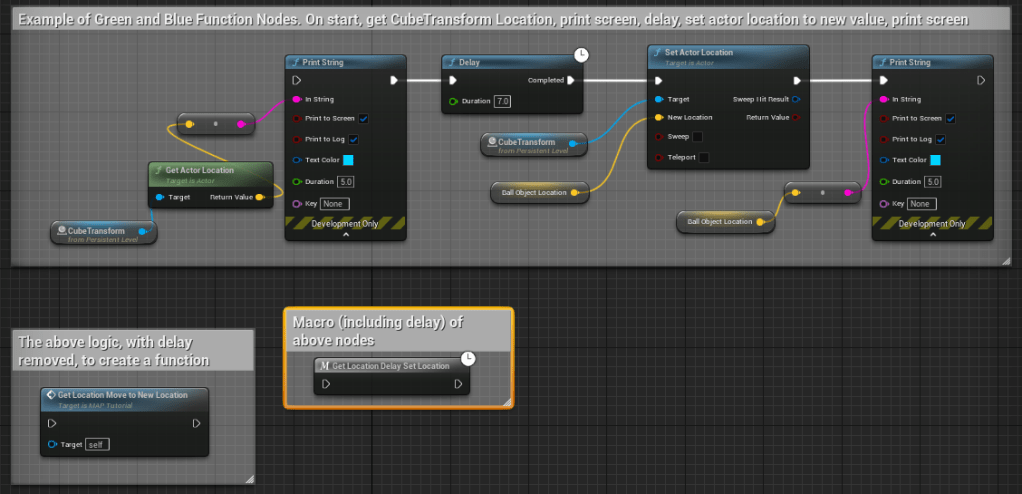
Macros are very similar in functionality to Functions, but they can contain delayed or timed function nodes. In the example above, the graph is fully encapsulated in the macro, and has a designated icon on it to indicate a timed event is part of the graph set.
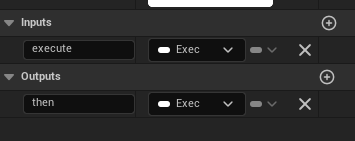
Defining Execution Pins for Macros
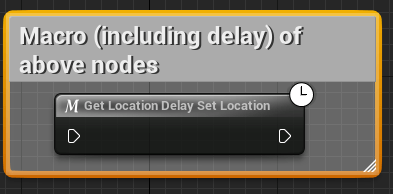
In the above example, this macro has an input and output execution pin defined. You’ll need to make sure in your graph that you define any variable needed to make an execution pin available.
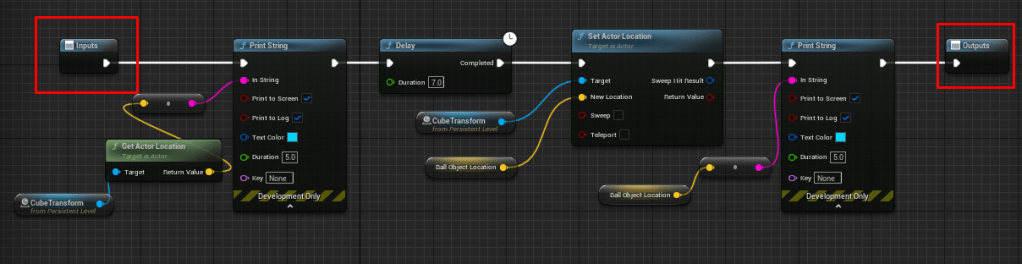
To add an input and output pin, select the end node of your graph and look in the details panel of the BP editor. Locate the Inputs and Outputs values and add new.